Customizing GitHub Copilot: A Quickstart for the Best Experience
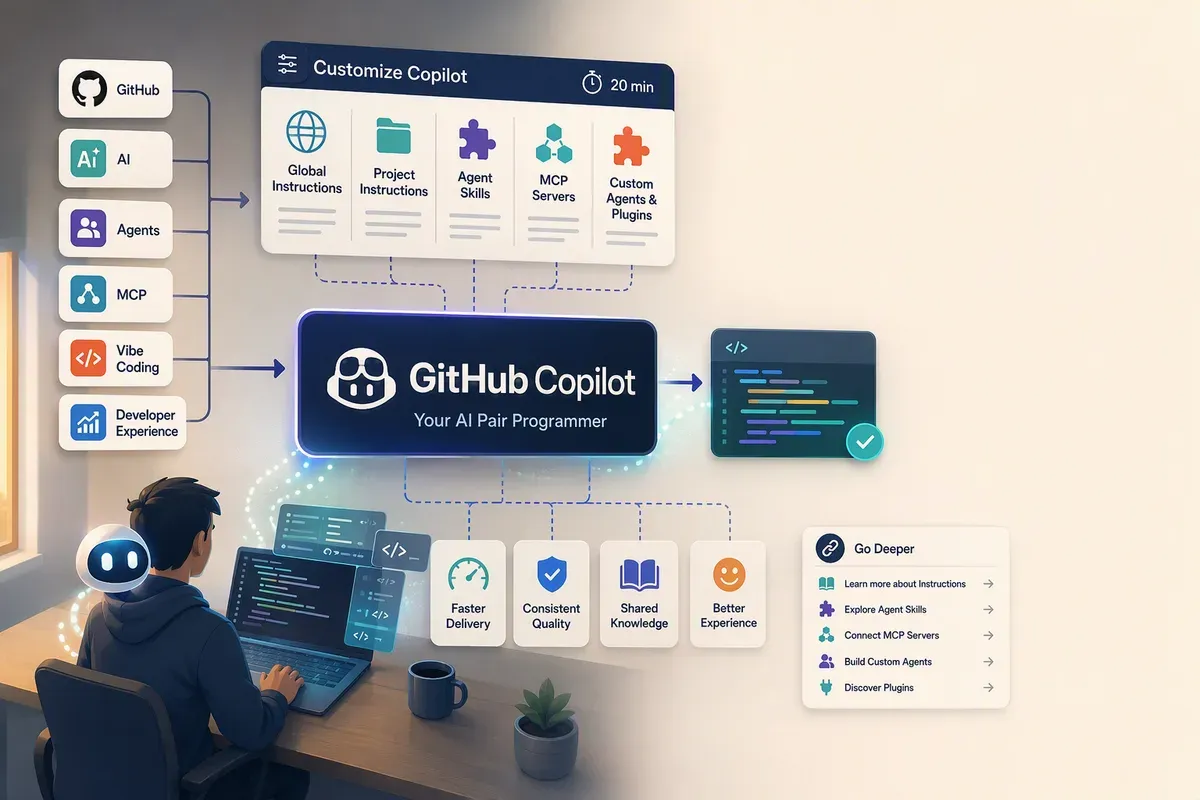
You asked the AI for one small change. It picked the wrong installer command, reformatted a file you never mentioned, made up a setting that doesn’t exist, and then told you it was finished without ever checking whether the site still worked. That was Tuesday. It happened again Wednesday.
None of that means you picked a bad tool. A fresh install of the GitHub Copilot app is a strong generalist. It knows an enormous amount about code in general and nothing at all about your project, so it fills the gaps with reasonable guesses. Some of those guesses are wrong.
The fix isn’t a cleverer way of asking. The fix is configuration, and it takes about twenty minutes.
A quick note on who this is for: you do not need to be a developer to follow this. I’ll define the jargon as it comes up, and any word with a dotted underline is one you can hover over (or tap on a phone) for a plain-language definition. Try it here: The written instructions that tell a computer what to do. Code lives in ordinary text files, and a project is usually made of hundreds of them..
This post is a quickstart in the shape of the GitHub Copilot app docs: a short path that gets the high-value customization in place, then links out to the official docs where each topic goes deeper than a blog post should.
Verified against GitHub Docs on 2026-08-09. Copilot ships fast, so check the linked docs before you standardize a process on any of this.
In this quickstart, you will
- Set global instructions that apply everywhere.
- Set instructions for one specific project.
- Add an agent skill.
- Connect an MCP server.
- Install a plugin and try a custom agent.
Before the steps, one piece of vocabulary that everything else hangs on. When you type a request into the Copilot app, you start a One ongoing conversation with the AI, working inside one of your projects. You can have several running at once, each on a different task., and the AI working inside it is called an An AI that doesn't just answer questions. It takes actions on its own: reading your files, changing them, and running commands to check its work.. The difference matters. A chatbot suggests. An agent goes and does it.
Prerequisites
- The GitHub Copilot app installed and signed in. If you haven’t done that yet, start with Getting started with the GitHub Copilot app.
- At least one project connected to the app. A project is a A folder holding all the files for one project, plus a full history of every change ever made to them. Often shortened to 'repo'. or a plain folder on your computer.
- A Copilot plan, or your own model provider set up through bring your own key.
Everything below lives in the app’s settings. None of it requires an administrator, and none of it changes your files.
Step 1: Write global instructions
Open Settings > General and set your global instructions. These are standing orders written in plain English. They apply to every project, so they should hold true no matter what you’re working on.
Mine are mostly about behavior, not technology:
- Lead with the answer, then the reasoning.
- Never invent commands, file paths, or settings. Look it up or say you don’t know.
- Make the change I asked for completely, then stop. Don’t tidy up code I didn’t mention.
- Run the project’s existing checks, the commands that confirm the project still works, before claiming something is finished.
- Never save passwords or keys into project files, and never weaken a security setting just to make a check pass.
That last pair matters more than the rest combined. An agent that quietly loosens a security setting to get a green checkmark is worse than one that stops and tells you it’s blocked.
Keep this short. Global instructions get read on every request, and a 2,000-word manifesto competes with your actual question for the agent’s attention.
Step 2: Add instructions for one project
Still in settings, find the Projects section and click a project’s name. The docs call these repository instructions, and they apply only to that one project, which makes this the place for anything specific.
Specifics are the whole point. Good ones to write down:
- Which A tool that downloads and installs the ready-made building blocks your project relies on, so you don't have to write everything yourself. npm is the common one for websites. the project uses, and the exact command to install things.
- Which folders hold which kind of file.
- The one command that checks whether a change actually works.
- Anything a newcomer would reasonably get wrong.
For this blog, that’s three sentences. Install with npm, using the versions
already recorded in the project’s
A file that records the exact version of every building block a project uses, so everyone gets an identical setup. Regenerating it casually can break things.
rather than fetching newer ones. Blog posts live in the src/content/blog
folder. And the command npm run build, which assembles the finished website
out of all those files, has to complete without errors before any change counts
as done.
Those three sentences eliminate an entire category of wrong guesses. This is the step with the highest payoff per minute spent, and it’s the one most people skip.
Why?Global instructions or project instructions?
Ask whether the rule would still be true in a different project. “Never save passwords into project files” travels with you, so it’s global. “The cover images on this blog are generated automatically, don’t make them by hand” is true in exactly one place, so it belongs to that project. Rules stored at the wrong level either get ignored as background noise or leak into projects where they’re wrong.
Step 3: Add an agent skill
Instructions tell Copilot how to behave in general. A skill teaches it how to do one specific job well, and a skill only loads when the job comes up, so it costs you nothing the rest of the time.
Think of a skill as a written procedure the agent can pull off the shelf. It’s a
folder containing a file named SKILL.md, which describes when to use the skill
and how to do the work, plus any reference material or small helper programs the
job needs.
Copilot looks for skills in two places: inside a project (in a folder named
.github/skills, .claude/skills, or .agents/skills) for skills that belong
to that project, and in your personal home folder (~/.copilot/skills or
~/.agents/skills) for skills you want available everywhere. Folder names that
start with a dot are hidden by default, so you may need to turn on “show hidden
files” to see them. Anything you’ve already set up for your projects or for
A version of Copilot you run by typing commands into a plain text window instead of clicking around an app. CLI stands for command-line interface.
shows up in the app automatically. You can also add and manage them under
Settings > Skills.
The best first candidates are the tasks you find yourself explaining the same way every time. This blog has three: one for drafting a post, one for the structural edit, and one for the tone pass that hunts down phrasing that reads like it came from a robot. That last one ran on this post.
Before you write your own, look at what already exists. The app ships with
built-in skills you trigger by typing a / command, like /orchestrate for
splitting a big job across several sessions at once. GitHub’s
github/awesome-copilot collection
has community-written skills you can install directly.
Step 4: Connect an MCP server
Model Context Protocol, almost always shortened to MCP, is a shared standard for connecting an AI to outside tools and data. An MCP server is a small program that speaks that standard on behalf of one system, whether that’s your project tracker, your database, or a cloud service.
This is the step that changes what Copilot can actually do rather than what it knows. Without it, ask about your open tickets and you get a plausible-sounding guess. With it, the agent goes and reads them.
Go to Settings > MCP Servers. There’s a catalog of popular servers to pick from, and you can add your own. As with skills, anything you already set up for your projects or for Copilot CLI is picked up automatically.
Two things are worth saying plainly before you connect anything.
An MCP server is software you’re trusting. It runs with whatever access you give it, and whatever it returns goes straight into your agent’s thinking. Give it the narrowest access that still works, prefer temporary access over a permanent password or key, and read what a community-built server actually does before you install it.
Treat anything a server returns as untrusted. Text coming back from a tool can contain instructions written to fool your agent, dressed up to look like ordinary data. That’s a real attack, called A trick where an attacker hides instructions inside content the AI reads, hoping the AI follows them as if they came from you., not a hypothetical one. It’s a good reason to keep anything destructive behind a confirmation step instead of letting it run while you’re away from the keyboard.
Step 5: Install a plugin, then try a custom agent
A plugin is one installable package that can carry several of the things above at once: skills, custom agents, MCP server settings, and Small automatic rules that run at set moments, like checking something every time the agent is about to save a file.. It’s the difference between telling a teammate to copy six files into the right folders and telling them to install one thing.
Open Settings > Plugins to browse and install. Two collections,
copilot-plugins and
awesome-copilot, are available by
default.
Then try a custom agent. In any session, type /agent and pick one. A
custom agent is a version of Copilot shaped for one kind of work, with its own
personality and its own rules. A code reviewer that only speaks up about bugs it
is confident are real behaves very differently from your general-purpose
assistant, and you want switching between them to be a deliberate choice rather
than something you hope the AI figures out.
How to tell it actually worked
Start a fresh session and give it a task you’ve given Copilot before. Three things should look different:
- It reaches for the right commands without being told.
- It stops and asks you instead of guessing when something is genuinely ambiguous.
- It runs your project’s check before it announces that it’s finished.
If nothing changed, your instructions are probably too abstract. “Write clean
code” does nothing, because the agent already believes it writes clean code.
“Install with npm ci, never npm install, and never regenerate the lockfile”
does something, because it’s a rule with an edge: one of those two commands
respects the exact versions the project already agreed on, and the other quietly
goes looking for newer ones.
The other honest signal is your own repeated corrections. If you’re typing the same feedback for the third session in a row, that feedback belongs in your instructions, not in the chat box.
Where to go deeper
The quickstart above covers the customization that pays off immediately. Here are the topics I deliberately left thin, with the official docs that cover them properly.
Customization reference
- Customizing the GitHub Copilot app, the source this quickstart follows
- Copilot customization cheat sheet, a table of which customization works in which Copilot product
- Slash commands for the GitHub Copilot app, the full list of shortcuts you trigger by typing
/
Working in the app
- Working with agent sessions. Run several agents at once, each working on a separate copy of your project so their changes can’t collide, and each with its own model and level of independence.
- Managing issues and pull requests. Take a task someone filed, have an agent do the work, and get it reviewed without leaving the app.
- Using automations. Save a task and have it run on a schedule, like a weekly dependency check that nobody has to remember.
- Using deep links. Special links that open the app directly on the right project or task, handy from a ticket or an internal tool.
Going further
- Working with canvas extensions. A canvas is a live panel next to your conversation, so you can see and edit what the agent is producing instead of reading about it. Type
/create-canvasin a session to build one. - Using your own LLM models. Connect an AI model from another provider using your own account.
Company-wide controls
- Supported surfaces for Copilot policies, which admin rules reach the app
- Configuring enterprise-managed settings, a settings file that controls which plugins people can install and whether agents may run commands without asking
If you only do one thing
Write the project instructions in step 2. Skills and MCP servers give you more capability over time, but the biggest single jump in quality comes from telling Copilot how this project works, and it takes five minutes.
Start there. Then add the rest as you catch yourself repeating the same correction. And if you set this up and something behaved differently than I’ve described, tell me, because the app is moving fast enough that parts of this will age.
Get the latest learnings
Occasional notes on Azure, AI, and cloud architecture. No spam, unsubscribe anytime.
Related articles
Coding with AI: A Neurodivergent Non-Coder's Guide to Building Real Apps
Field-tested lessons from shipping with AI: use plan mode, build reusable skills, choose models deliberately, and keep a reviewer in the loop.
Microsoft Foundry Canvas: A Visual Front End for Agent Code
Foundry Canvas puts model selection, toolboxes, guardrails, testing, and deployment in a Copilot side panel while leaving you the actual agent code.
The Vibe-Coding/Engineering Stack I Actually Ship With
The AI tools I use to design, ground, review, and ship vibe-coded projects, from Impeccable and Microsoft Foundry to MCPs and Power Platform Skills.
Comments
Comments are hosted by GitHub Discussions. Loading them connects your browser to giscus.app and GitHub.